How to repair MBR on Windows 7?

Sometimes you can corrupt Windows' MBR (Master Boot Record) unintentionally, through installation of another operating system for instance, and you need to repair it before Windows can boot again. The error message that you usually get is "Operating System not found". Under Win 95, 98 and ME, you could have used a standard MS-DOS utility called FDISK in the Command Prompt console. However, FDISK is not distributed with Win NT, 2000, XP, Vista, and 7. So you either have to resort to finding an alternative utility called MbrFix.exe and run it from floppy, optical or USB drive or follow these direction from the installation DVD to repair your MBR. While these directions are specific to Win 7, you maybe able to use the knowledge gained to apply to your particular Win install.

Instructions

Step 1:
Insert Win 7 installation DVD and boot from DVD drive. While in some older systems you may have to change boot order through system BIOS, most newer systems allow booting from DVD without changing boot order by simply clicking on any key when prompted to doing so.

Step 2:
Choose your default "Language", "Time", and "keyboard Input" on the first window and click next.

Stepp 3:
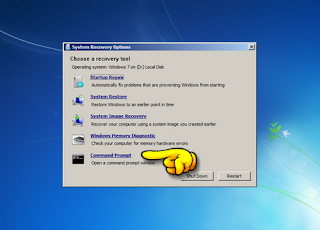
You're now presented with 3 choices. Click on "Repair Your Computer" to gain access to the System Recovery window. Now choose "Command Prompt" in order to run the desired utility which is called "bootsect.exe". Bootsect is located inside the boot folder so change your directory to boot. Now run "bootsect /nt60 C:\" if you had Win 7 initially installed in the C partition. Alternatively, you can run "bootsect /nt60 SYS" or "bootsect /nt60 ALL" to repair the system partition or all partitions. Eject the DVD, and restart computer. Your computer should now boot Win 7 again.

How to Download Registry Repair?


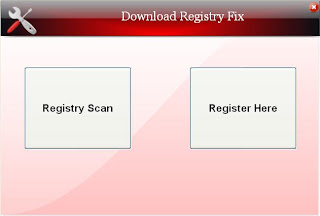
Registry Repair is a program designed to restore and correct issues with your Windows registry. The registry houses information pertaining to all programs and hardware; however, when you remove a program from the computer, small bits of files and information are left on the registry, which can significantly slow down the computer when booting it up. Registry Repair corrects all of these issues and is available for download.

# Step 1: Open your Internet browser and navigate to registryrepair.net.

# Step 2: Click the "Download" button for the free trial version. To purchase the program, select the "Purchase Software" tab in the program window when you have finished installing the program.

# Step 3: Double-click the downloaded file to open the Registry Repair installation wizard. Accept the user license agreement, then click "Next" until you reach the installation page. Click "Install" and Registry Repair will install onto your computer.

How to Fix an Offline HP Printer?


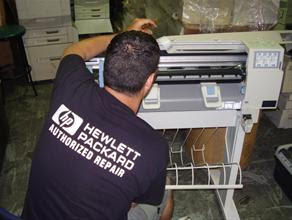
Timeframes are a part of a typical day in the life of the office worker. When an HP printer goes offline, it can easily stifle your workflow, which in turn can cause frustration. Now put that hammer down and realize that there are a few troubleshooting steps to try before resorting to such extreme methods. Relax, take a deep breath and get your printer back online so that you can view the ink on printed paper.

# Step 1: Check the cables to and from the printer to the computer and make sure that all of the connections are secure. A disconnected cable is often the cause of rendering the printer offline.

# Step 2: Turn the printer off and back on. Sometimes it could be just a glitch in the network. Reset the printer by turning it off and then wait 60 seconds and turn it back on again.

# Step 3: Check the toner or ink cartridge. Most HP printers have the capacity for both color and black ink or toner cartridges. They will normally run on just one of the two; however, when the one installed becomes too low or is installed incorrectly, it will go offline.

# Step 4: Check for torn paper, paper clips, sticky label residue and other items that could be the cause of printer jams. Any of these will stop a printer in its tracks.

# Step 5: Set the printer as your default printer and see if this resets it to online status. From the Start menu, select "Control Panel". Select "Printers and other Hardware". Under "Pick a Task", select "View Installed Printers or Fax Printers". Select the questionable printer that is offline. Select "Printer" from the pull-down menu. Click on "Set Printer as Default".

How to Connect to an XP Home Computer ?


Setting up a home network improves your overall computing experience by allowing you to share files and play games across multiple computers in your network. Connecting to a computer running Windows XP Home is a routine procedure that can be completed in 20 to 60 minutes, depending on how many computers you wish to connect.

Step 1:
Plug an Ethernet cable into the network port on the back of each computer and connect the other end of the Ethernet cables to the ports located on the back of the router.

Step 2:
Run the Network Setup Wizard on the computer running XP Home. Open the "Start" menu, click on the "Control Panel," select the "Network Connections" option, and press the button for the setup wizard.

Step 3:
Input the salient features about your network, including the number of computers and the type of network you are setting up. Set the Workgroup as "XPHOME."

Step 4:
Repeat the procedure on the other computers in your network.

Step 5:
Restart all computers to complete the connection.

How to Repair Slow Computers?


A slow computer can be frustrating and time consuming. Simple computer tasks can take minutes to load, or not work at all. Keeping your operating system free of viruses, spyware and extra computer files can speed up your computer dramatically. There are many reasons for system slowness, most of which you can fix for free at home.

Step 1:
Run your antivirus and malware software. Viruses can cause processes to run in the background, which slows your computer. Malware can cause advertisements or popups that pollute your desktop.

Step 2:
Remove unnecessary programs. Click "Start" then "Control Panel," and find "Programs and Features." Right-click and "Unsintall" programs you no longer use or toolbars that attach to your Internet browser. This frees disk space and makes your computer run more efficiently.

Step 3:
Run "Disk Cleanup" by clicking "Start" and "All Programs." Click "System Tools" and "Disk Cleanup." You can delete temporary Internet files, Java applets, dump the Recycle Bin and remove old restore points from this menu. Most space you free using Disk Cleanup will come from temporary Internet files.

Step 4:
Click "Start," and then "Run." Type "msconfig" in the box and click the "Startup" tab. Uncheck any processes you do not want to load at startup. This improves loading time when you turn your computer on.

Step 5:
Run "Disk Defragmenter" to correct system slowness. Defrag clumps files and folders together so your computer can find find files faster, which speeds loading time. Use Defragmenter after you have deleted unnecessary files by clicking "Start" then "All Programs" and "Accessories." Click "System Tools and "Disk Defragmenter" to run it.
Powered by Blogger